
Hair Transplant
How to Take Photos for a Hair Transplant Consultation
Prepare seven clear photos for an initial consultation: your face and hairline, the top and crown, both profiles, a chin-up view and the donor area. Even lighting and a complete set help the doctor review your case, but photographs do not replace an examination or final medical assessment.
Published: 15 September 2026
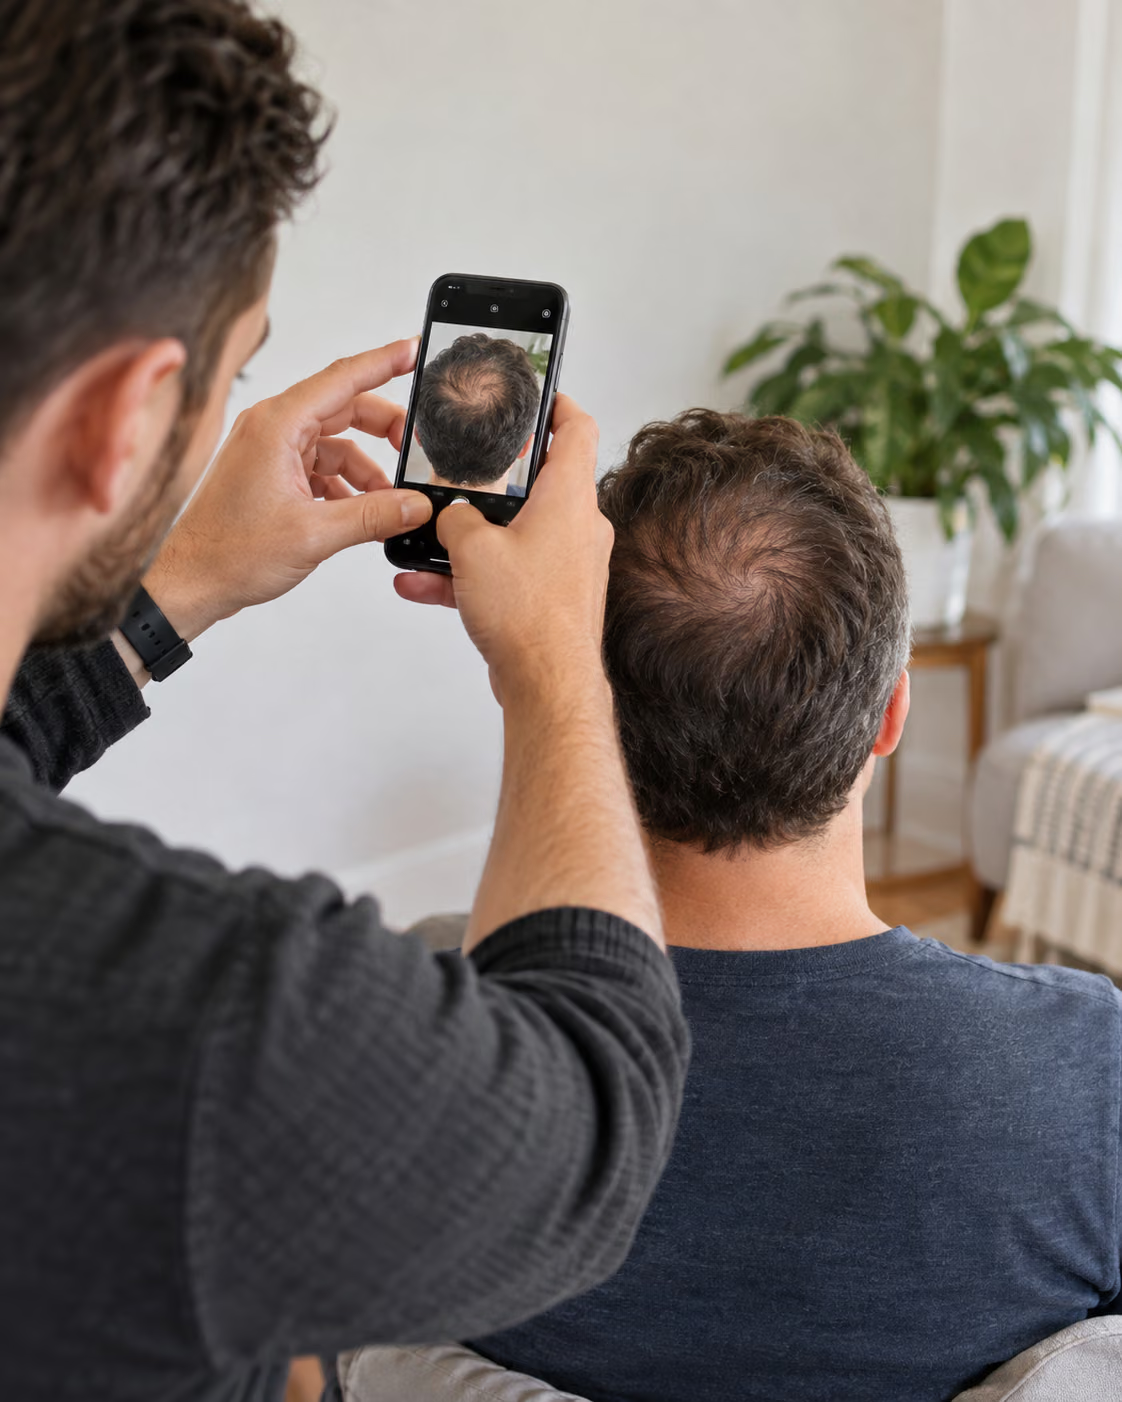
Why is one selfie not enough?
Before a hair transplant, the doctor needs to see both the area that may need coverage and the donor area. A front-facing photo does not show the crown or the back of the head. A close-up of the temples alone does not show the overall pattern of hair loss.
Research on hair-loss photography shows that repeatable views, consistent head position and even lighting make images more useful for assessment. Online photographs support only a preliminary review. They do not replace a scalp examination, trichoscopy or an in-person medical consultation.
How should you prepare?
- Ask another person to help, especially with the top, crown and back of the head.
- Stand near a window or in a bright room. Avoid strong backlight and dark shadows.
- Use the rear phone camera, clean the lens and switch off filters, portrait mode and beauty enhancement.
- Keep the hair dry and free from gel, hairspray or concealing fibres. Wear it as you normally do.
- Do not cut your hair immediately before taking the photos. The current Flymedica form asks for at least two weeks since the last haircut.
- Avoid digital zoom. Fill the frame with the head without cropping its edges.
The seven photos needed for an initial consultation
- Face and hairline: straight on, with the full forehead visible.
- Top of the head: camera above the head, showing the hairline and mid-scalp.
- Crown: from behind and slightly above, without combing hair over the whorl.
- Left profile: show the temple, recession and side of the head.
- Right profile: repeat the same view from the other side.
- Chin-up view: tilt your head back and look upwards to show the frontal hairline from another angle.
- Donor area: photograph the back of the head, gently lifting the hair so the occipital density is visible.
Take each view separately. Do not combine them into a collage or retouch areas with lower density.
How can you take the photos on your own?
Place the phone on a stable tripod or secure support at head height. Use the timer, stand about one metre from the camera and check focus after every shot. For the top, crown and donor area, use a mirror only to position yourself, not to photograph the reflection. Reflected images are harder to frame and keep sharp.
If the back of the head is not clear, ask someone for help instead of sending a blurred photo.
Common mistakes that lead to repeat photos
- sending only one front photo or a very close selfie,
- using filters, portrait mode or automatic skin smoothing,
- photographing wet, heavily styled or freshly clipped hair,
- working in a dark room, against a bright window or with shadows over the scalp,
- showing only the thinning spot rather than the full head and donor area,
- sending a screenshot or an image heavily compressed by a messaging app.
What can a doctor assess from the photographs?
A complete set can help show the visible pattern of thinning, the hairline, crown and apparent donor-area density. The doctor also considers history such as age, progression, health conditions, medication and previous procedures.
Photos cannot confirm the cause of hair loss, determine a safe graft count by themselves or guarantee eligibility. The final plan belongs to the doctor at the independent clinic. Read more about how hair-transplant eligibility is assessed.
How should you send the files?
Select “Hair transplant” in the Flymedica form and add each photo to its matching slot. As checked on 15 September 2026, the form accepts JPG, PNG and WebP files up to 9 MB each. Do not post scalp photos in public comments or open social-media channels.
Flymedica coordinates contact and forwards the material to the independent clinic. If a required angle is missing or unclear, the consultant may ask for a replacement image.
Photos start the consultation; they are not a diagnosis
Flymedica helps collect the material and coordinates contact. It does not decide eligibility, diagnose hair loss or determine the graft count. Medical assessment and treatment planning remain the responsibility of the doctor at the independent clinic.
Sources and supporting material
- Flymedica consultation form, current required views and file limits, checked 15 September 2026.
- A practical guide to the standardization of hair loss photography for clinicians, Clinical and Experimental Dermatology.
- Hair Transplant Practice Guidelines, donor-area assessment and documentation.
This content is for information only and is not medical advice. Photos allow only a preliminary review. Diagnosis, eligibility and treatment planning are determined by the doctor at the clinic providing treatment.
Questions and answers
Frequently asked questions
How many photos are needed for a hair transplant consultation?
The current Flymedica form requires seven views: face and hairline, top, crown, both profiles, a chin-up view and the donor area.
Is a selfie enough?
No. A selfie may show the hairline, but it usually does not show the crown or donor area. Ask another person to take some of the photographs if possible.
Can the hair be wet or styled with gel?
It is better to photograph dry hair without gel, hairspray, concealing fibres or filters. A natural appearance supports the preliminary review.
Are photographs enough for final eligibility?
No. They support a preliminary review only. The doctor may need more information, a scalp examination or trichoscopy before making a final plan.